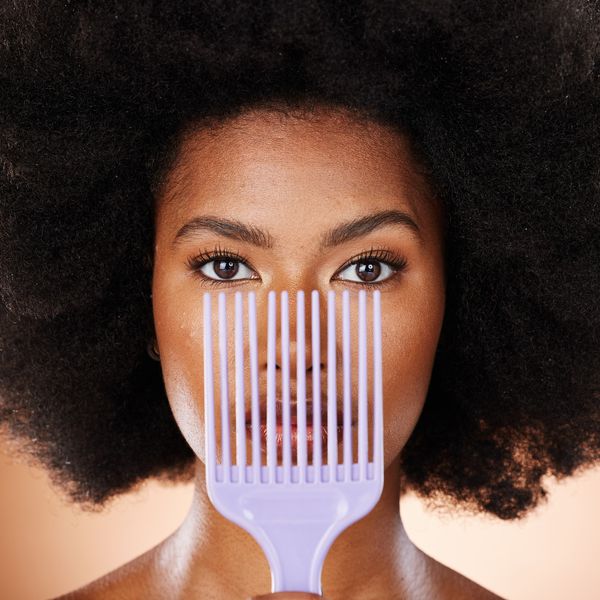
There are some women I know who wait until fall and winter to flat iron or silk press (you can watch a professional do a silk wrap by clicking here) their hair. When you stop and think about how freakin' hot and humid it is during the summer months, along with how a lot of us are prone to shrinkage during that time of the year, I totally get why. Waiting to apply heat styling tools to your hair during the seasons when you don't have to do it as much is a super smart move if you want to maintain length retention.
So, whether you want to straighten your hair to see how long its gotten, you've got a special occasion coming up where you want to rock a different style, or you simply need a few tips on how to apply heat without wrecking your tresses in the process, here are 10 tips that can make using a blow dryer, curling iron or flat iron something that you don't have to be scared to try.
1. Purchase an Ionic Ceramic Hair Dryer
If you wanna know one of the main reasons why heat damages our hair, it's because we don't have the right kind of tools. Take blow dryers, for example. It wasn't until I got myself an ionic ceramic one that my hair ended up a lot less fried (well, that and not blow drying it while it was wet; I'll get more to that in a minute). The reason why you can't get wrong with that particular kind of dryer is because ionic dryers are able to literally produce millions of negatively charged ions that can manipulate water molecules without damaging your hair's cuticles in the process. How? Because this type of dryer doesn't open up your hair shaft. The ceramic part of this type of hair dryer is able to regulate the temperature in the room that you're drying your hair in, so that it automatically gets hotter or cooler, so that your hair isn't overprocessed by the heat. As a result, a blow dryer that has both of these features, can significantly reduce your chances of experiencing heat damage. If you'd like to try one out, the Conair 1875-Watt Tourmaline Ceramic Dryer receives a lot of praise for getting the job done well.
2. Deep Condition Your Hair Every Wash Day
It's a lot harder to burn a wet blade of grass vs. a dry one. That's pretty much the logic of why you should deep condition your hair. Personally, I'd advise doing it every wash day but definitely before you decide to blow dry, use a curling iron or flat iron your hair. Dry brittle hair isn't able to withstand heat quite like well-moisturized hair can, so definitely apply a thick conditioner after shampooing your hair and let it sit for no less than 30 minutes (even a couple of hours is bomb). Your hair will love you for it.
3. Get Regular Protein Treatments
This is a tip that's important, not just when it comes to protecting your hair from heat damage, but also when helping your hair to gain some real inches. Since our strands are made up of mostly protein (keratin), doesn't it make perfect sense that we'd need to "back our hair up" with a little extra protein from time to time to make sure that it has all that it needs?
As far as the benefits of protein treatments go, they are able to "fill in the gaps" that may occur to your hair shaft due to chemical treatments and heat styling. Protein treatments also can bring elasticity back to your hair and reduce breakage, if your hair seems weaker than usual. And since protein treatments are able to strengthen your locks, then it's another way to keep your hair shielded from heat.
As far as how often you need a protein treatment, every 4-6 weeks is pretty standard. For tips on how to choose the best one, click here.
4. Use a Cream Thermal Heat Protectant
Hey, you can tell yourself that you don't need thermal heat protectant if you want to, but I promise that you'll be lying. One of the main benefits that comes with applying this to your locks before you blow dry your hair is it helps to seal in the moisture as it also slows down the heat conduction whenever you're blow drying your hair. This results in heat being applied more evenly and your hair heating up more gently so that less damage occurs in the long run. The main things to remember when it comes to thermal heat protectants are 1) get one that is silicone-based and 2) if you've got 3- or 4-type hair, go with a cream rather than a liquid or spray. Creams are thicker which means that your hair will be coated—and protected—so much better with one.
5. Let Your Hair Dry (at Least) 60 Percent Before Blow Drying
Lord. If there is a heating faux pas that I used to make, for years and years, it was barely towel drying my hair (it's better to use a T-shirt, by the way; it absorbs the water effectively and is gentler on your locks that a towel is) before pulling my blow dryer out. Then, I heard a YouTube naturalista (I can't remember who exactly) say that she lets her hair air dry at least 60 percent before she blow-dries hers when she's trying to achieve a blowout.
And guess what? That works big time! I'm thinking that a part of it is because barely damp hair has a greater chance of avoiding the smoke and frying that can come when your blow dryer is too hot. Also, since your hair is closer to being dry, you don't need quite as much heat to finish the job. (By the way, medium heat should be more than enough. High temps are for impatient folks and if you're rushing, you shouldn't be applying heat to your hair anyway.)
6. Keep Tools Under 350-400 Degrees
While a lot of people will say that it's impossible to apply heat to your hair without damaging it, there are scientists that disagree. Since 450 degrees can set a piece of paper on fire, many say that if you make sure that your heat styling tools are somewhere between 350-400 degrees (and you don't let your hair sit with that level of heat on it for a long period of time), you should be fine.
That said, it's important that you get a flat iron that has a temperature button setting on it, and that you make sure the plates are made out of either tourmaline or titanium (it glides along the hair smoothly and lasts longer than other flat irons), and that you use as little product as necessary; too much can cause the plates to stick to your hair which could inadvertently result in heat damage.
7. Blow Dry Thoroughly Before Flat Ironing
Another huge heat styling mistake that you should avoid is going from air drying to flat ironing; that is a surefire way to give your hair heat damage. Instead, after your hair is mostly dry, make sure that you run a blow dryer through your hair. It doesn't have to get as straight as possible (your flat iron will take care of that), but it does need to be significantly stretched. If your blow dryer (on a low or medium setting; nothing more) does most of the work, you can easily do a one-pass with your flat iron and be good to go.
8. Don’t “Pass Through” a Billion Times
If you were to hop on YouTube right now and watch DIY videos on how to use a curling iron or flat iron on natural hair, I doubt you'd see anyone advise that you run an iron through your hair more than twice. While bone straight might be your ultimate goal, oftentimes that can come with damaging your hair in the process (which is totally not worth it). Besides, if you break your hair up into small sections and then use the chase method (which is when you comb through each section and then "chase it" with your iron afterwards), your hair should get pretty straight and if you wrap it up at night, it should remain impressively straight for several days.
9. Go Easy on the Oils
Back when some of us got our hair pressed, grease was sho 'nuf present. I think that's why a lot of us think that we need to inundate our hair with oil while applying a heat styling tool to it now. Actually, that's not the case. Oftentimes, all that does is cause your hair to get hotter than it should which can also cause damage, if not immediately, eventually. While carrier oils like sweet almond, jojoba, avocado, grapeseed, argan and marula oil (it's an oil that contains 60 percent more antioxidants than argan does) are all good for your hair, try and use no more than a dab in your palm while using your tools; then, if you want a little more sheen, run a bit more through your locks after you are done with your curling iron or flat iron. (Bonus tip: Add a few drops of your favorite essential oil into your carrier oil. Your hair will smell divine if you do!)
10. Remember That Less (Frequently) Is More
Finally, if you want your hair to be longer instead of shorter come spring, definitely apply the "less is more" approach. For the most part, putting heat on your hair, more than once every 10 days or so, is going to end up causing some sort of damage. And just how can you know if that is indeed the case? If you notice split ends, white knots on the end of your hair, that your locks are super dry, breaking off or that your hair has a rough texture to it—all of this points to laying off of the heat, trimming your ends and doing some deep conditioning for a while.
Oh, also remember to ONLY apply heat styling tools on clean hair. Otherwise, the dirt, debris, and product build-up that you have will literally end up getting "cooked" into your hair shaft, every time you put heat on it.
Welp, there you have it. 10 ways to approach applying heat to your hair. If you put all of them into practice, you'll significantly increase the chances of having the best of both worlds—straight hair when you want it and healthy hair no matter what.
Join our xoTribe, an exclusive community dedicated to YOU and your stories and all things xoNecole. Be a part of a growing community of women from all over the world who come together to uplift, inspire, and inform each other on all things related to the glow up.
Featured image by Shutterstock
- Hair Breakgage: Reasons Natural Hair Is Breaking Off - xoNecole ... ›
- How To Care For Your Hair Under A Wig - xoNecole: Women's ... ›
- How To Strengthen Weak Hair Follicles - xoNecole: Women's ... ›
- Are You Keeping Your “Denial Length”? Here's Why You Should ... ›
- A 4-Step Process That Actually Prevents Heat Damage - xoNecole ... ›
- How To Fix Your Biggest Curly Hair Pet Peeves - xoNecole ... ›
- How to Prevent and Repair Heat-Damaged Hair | Dermstore Blog ›
- How to Avoid Heat Damage to Your Hair | NaturallyCurly.com ›
- How to Protect Natural Hair From Heat Damage ›
- Tips for Avoiding Heat Damage - Toppik Hair Blog ›
- How To Prevent Heat Damage To Your Hair | The Trim ›
- 20 Hair Straightener Hacks That Will Turn Your Hair Into Art ›