
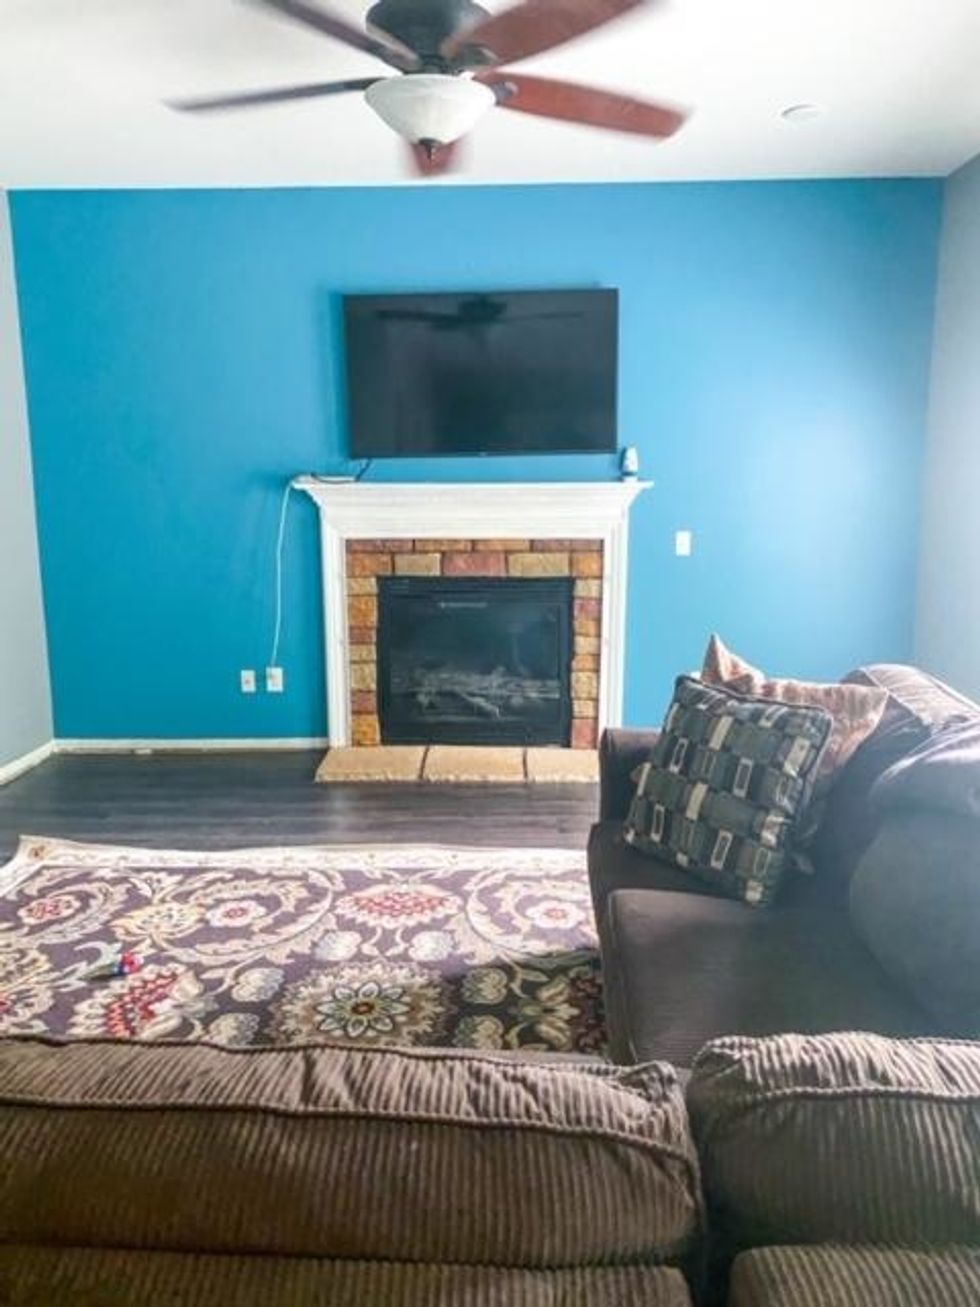
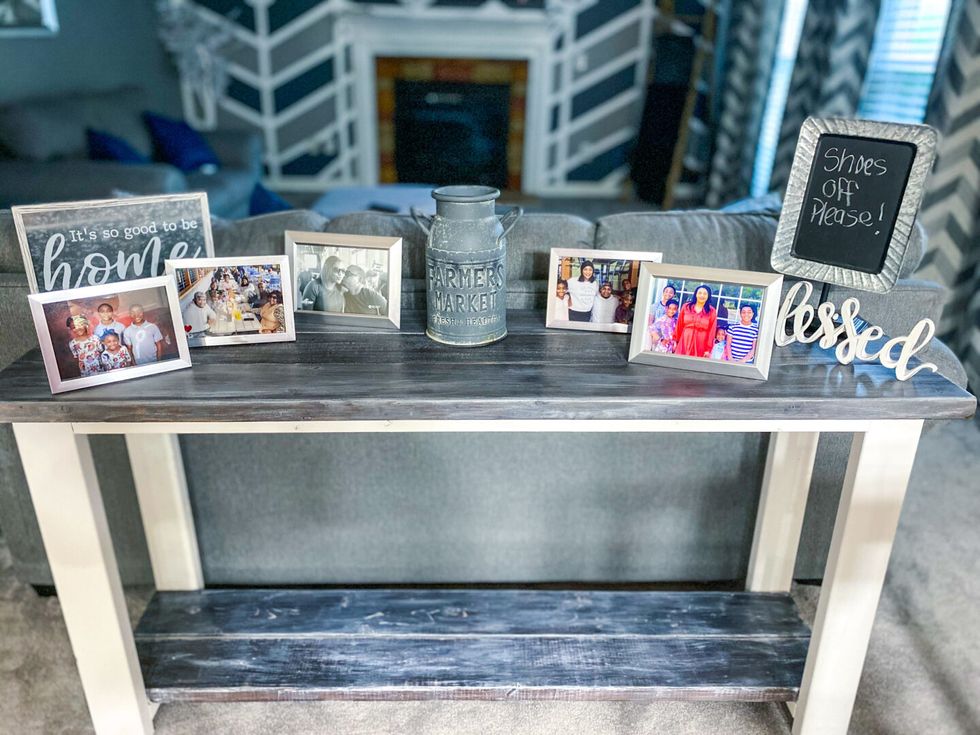
I know that during this quarantine phase, everyone has taken on a love for at-home DIY project––including me and my husband. We first started with our patio and now our family room. We got it painted last year and to be honest, I don't know what I was thinking when I had my accent wall painted blue. Well, I take that back, I do know what I was thinking.
I was trying to bring the "beach" to my home by having my accent wall blue (like the sea), the outside walls grey, and my kitchen beige (the sand). But after some time passed, I wasn't fond of the idea. Plus, my husband started working on the floor and never finished. Hey, I give him his props he did start, but the floor hasn't been finished... and it's been a year!
With that in mind, I put on my creative cap and got to work on giving my living room a total makeover.
This was my step-by-step process on elevating my home with a DIY accent wall:
Here's what you'll need:
- 1-gallon white paint
- 2 thick paint brushes
- 2 large paint rollers
- 2 small paint rollers
- 1 steady hand
- 2-3 rolls of frog painters tape (Lowes guy said it works better than the blue tape)
- 3 paint buckets
- A couple of old blankets to cover the floor
- 1 ladder
- 1 measuring device
- 1 pencil
Being home, I was able to allow my creative juices to flow thinking of how I wanted to change my family room. I wanted to keep the grey theme and didn't want to do a lot of work, if you know what I mean. So I started looking up different ideas for accent walls. I did toy with the idea of wallpaper but my husband wasn't down with that plan. I also was thinking about painting it just one solid grey color, but that would be too plain for the vibe I was going for.
I took to Pinterest and saw a chevron print and fell in love. Y'all, I looked high and low for a chevron print stencil and I've seen others do their walls with a stencil, but I couldn't find one large enough. The small ones would have taken days maybe even weeks to finish. My husband is an Architect Designer, so I asked him if he thought he would be able to do it with tape and he was like, "Oh yeah, I can do that!"
Step Two: Painting
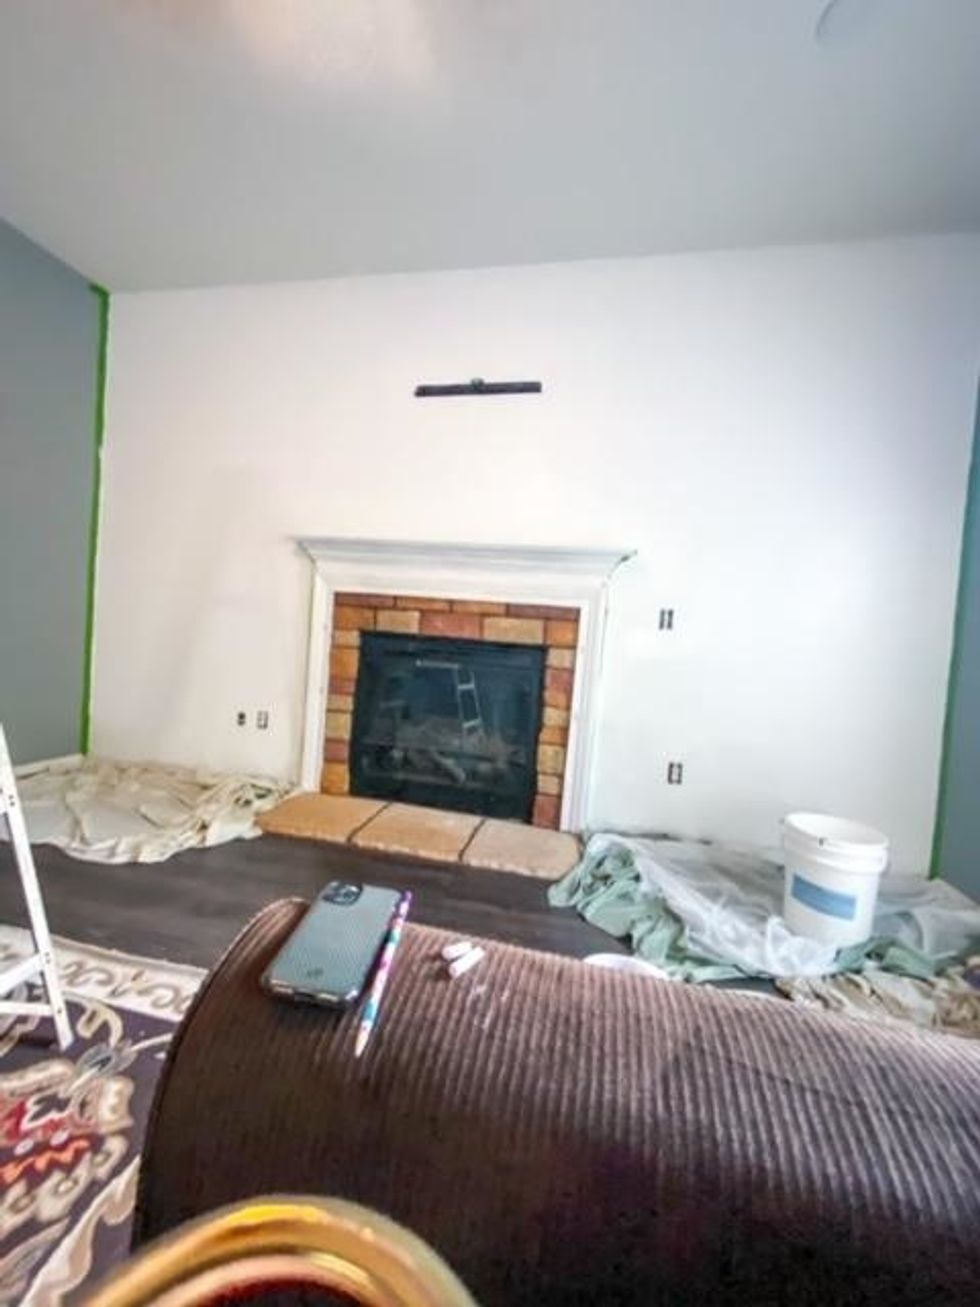
We first had to paint the wall white. Thank God for my husband because I was going to do it all backwards. I was going to tape it then paint it white, my husband informed me that if we did it that way, we would be painting for days and then it wouldn't have looked right.
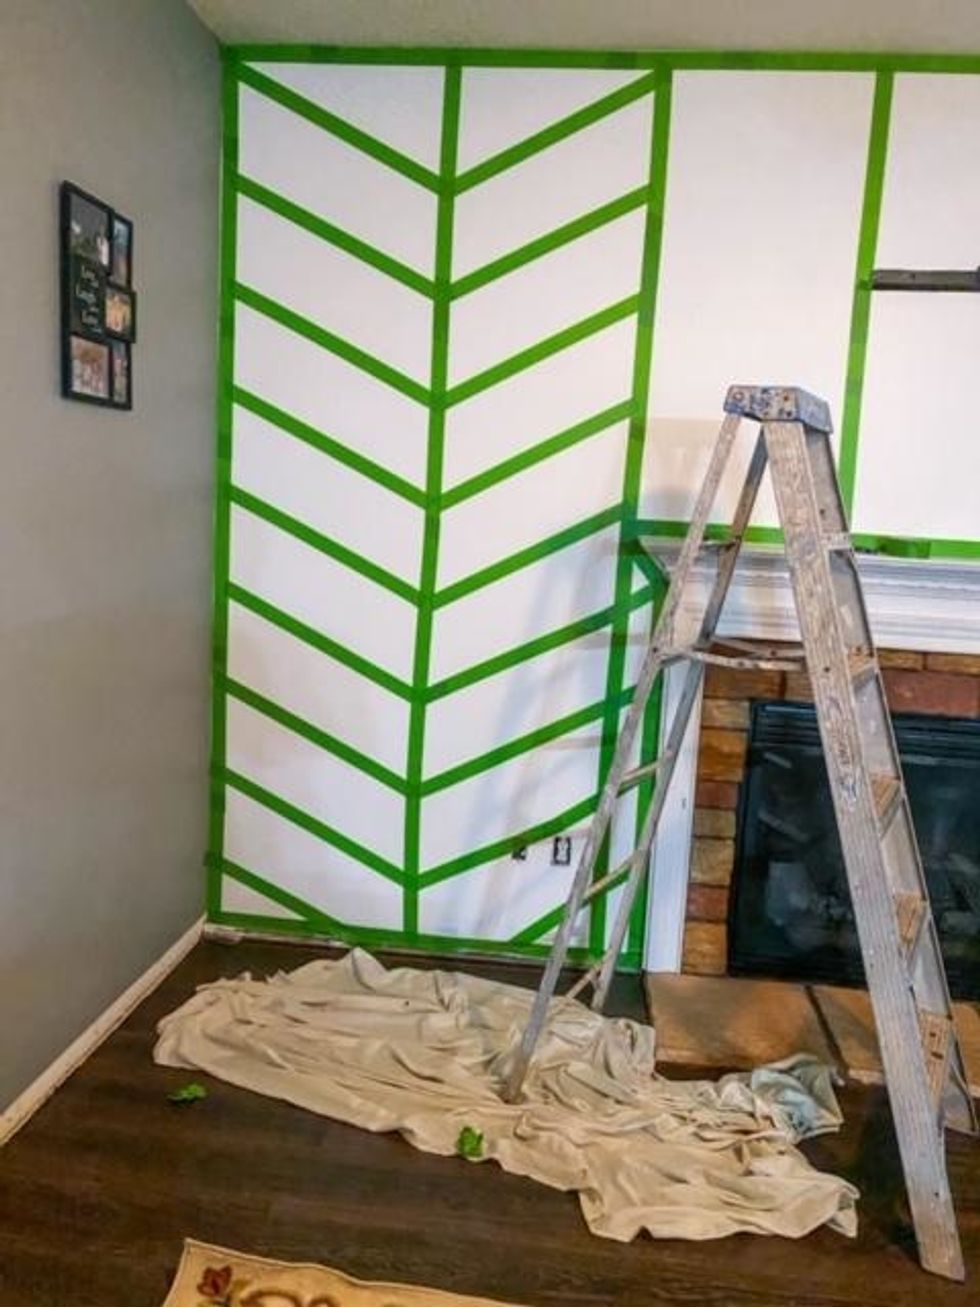
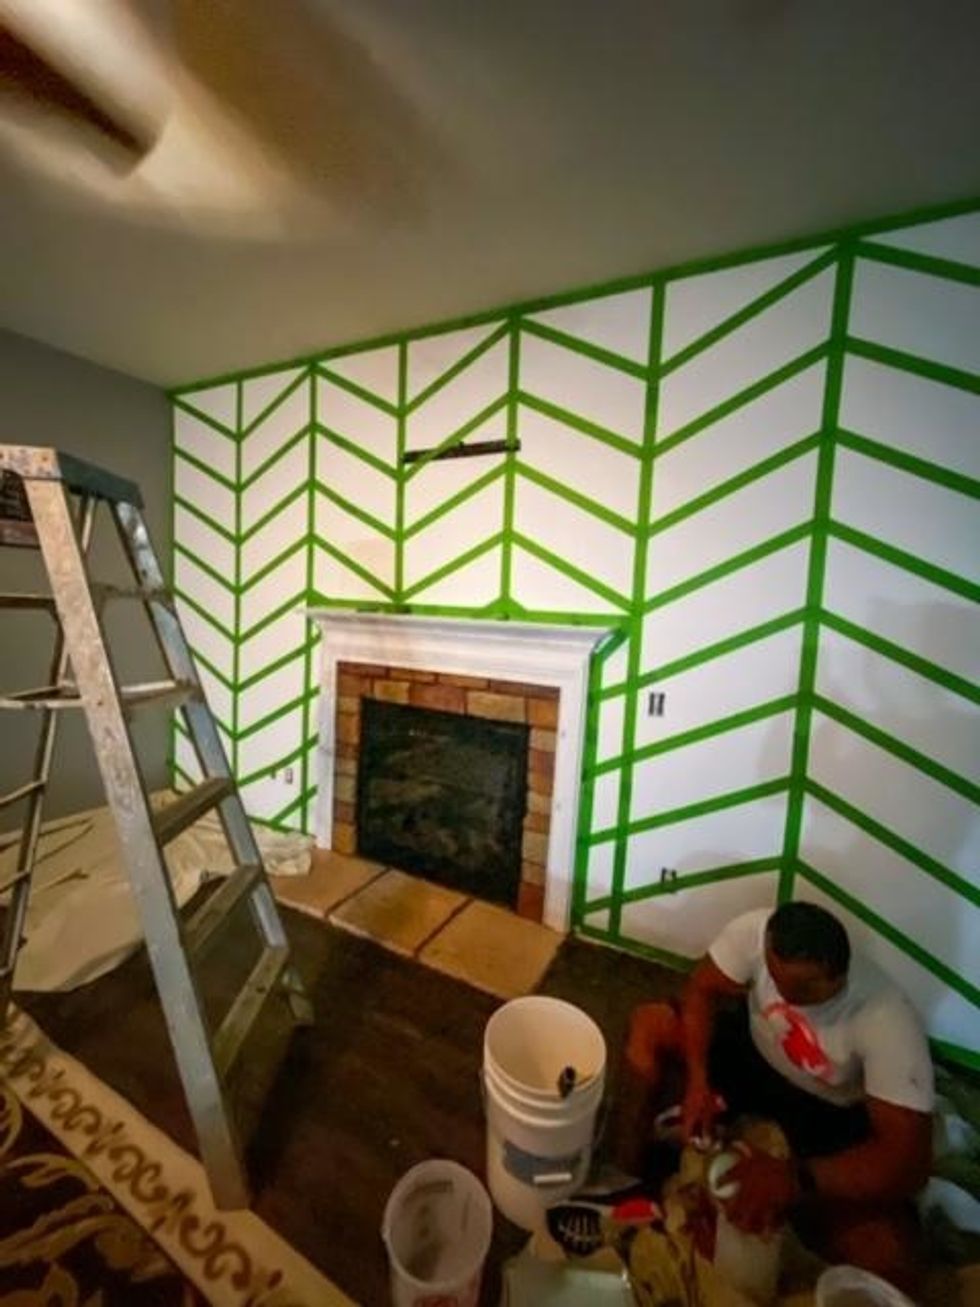
Step Three: Taping
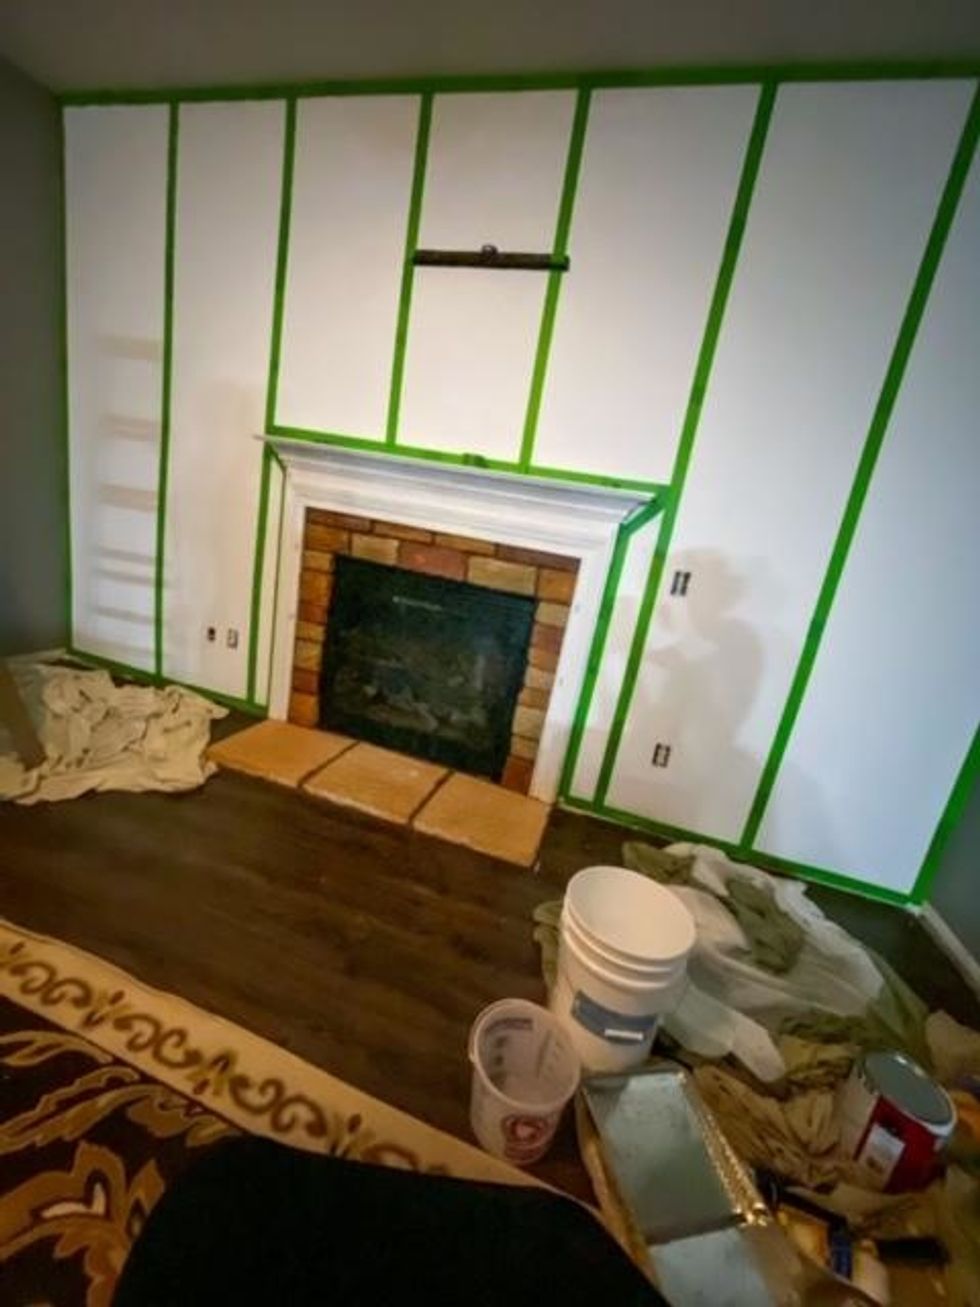
Next up is taping. I am going to be honest I didn't know that "math" was going to be involved. I seriously thought that all we had to do was put tape up in zigzags. Again I thank God for my husband who brought me back to reality real quick.
You need to measure your wall from top-to-bottom and side-to-side. It's important for you to have in mind how many patterns you want. I wanted six in total. So my husband measured and taped the wall according to his measurements. Keep in mind that everyone's measurements will be different because it's according to your wall size.
Now here is where the math comes into place again. To get the chevron print, you have to place the tape on the wall in a zigzag shape. My husband measured for each zigzag to be two-feet apart. And you follow this throughout the entire wall following the taped-off sections, moving from top to bottom.
Step Four: Fill In The Blanks
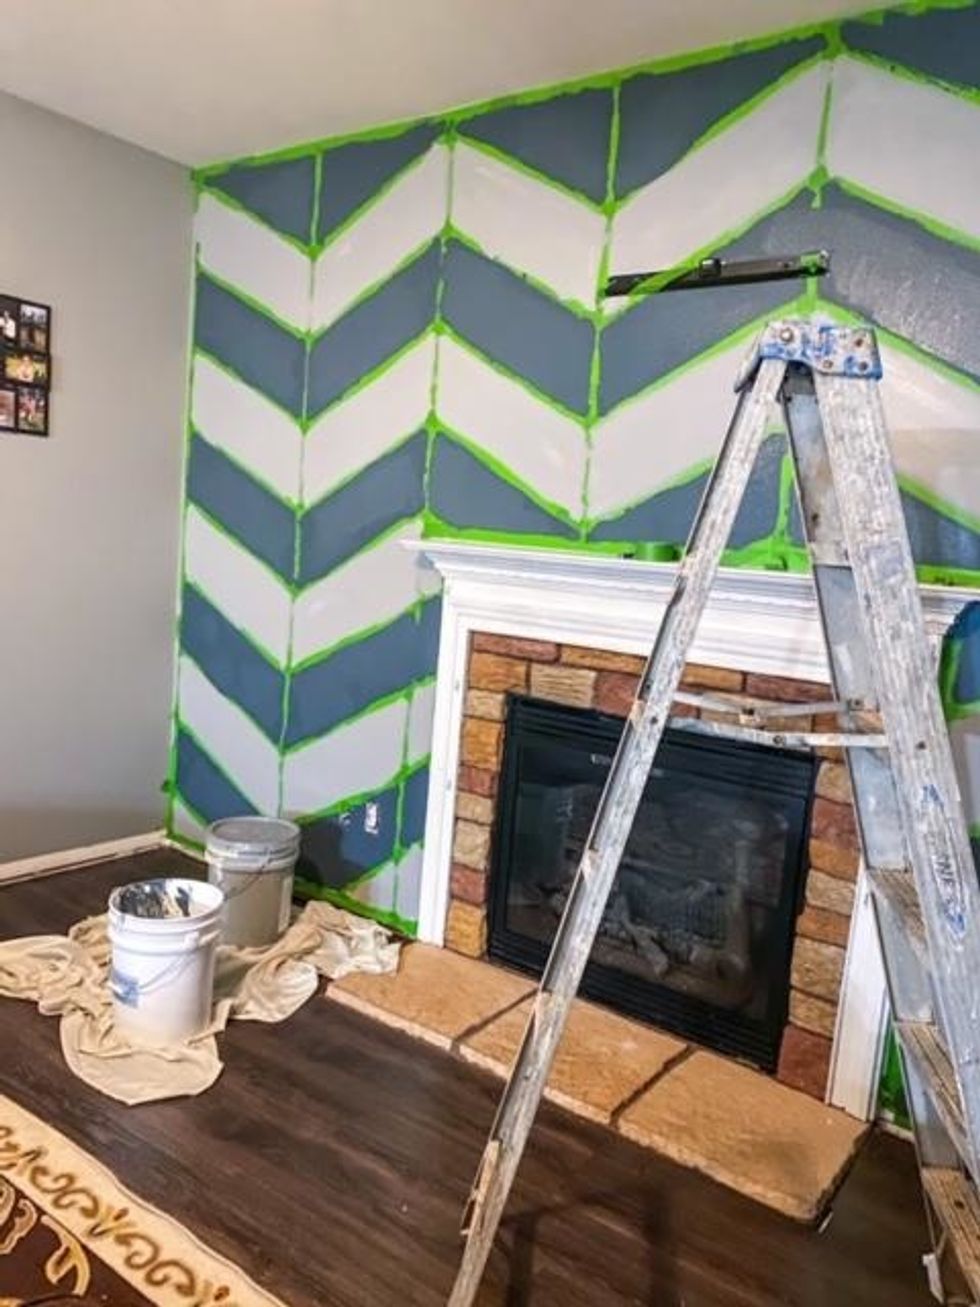
Now, this is where the fun and intense part starts! You need to have your two colors picked out. I chose a light grey and a darker grey. Go over with a pencil in each zigzag and write in the color you want to paint in each zag. Use your roller to paint the color in each section. To make it easier, my husband had one color and I had another, that way we didn't get it mixed up.
Be careful and don't go too fast you can mess up easily if you're not paying attention! After you have done this, let it dry for a little bit. Then, you carefully take the paint off and boom!
The Final Reveal

Can you say WOW? It doesn't even look like the same room. If you ask me, it looks like something out of the Southern Living Magazine! We did that!
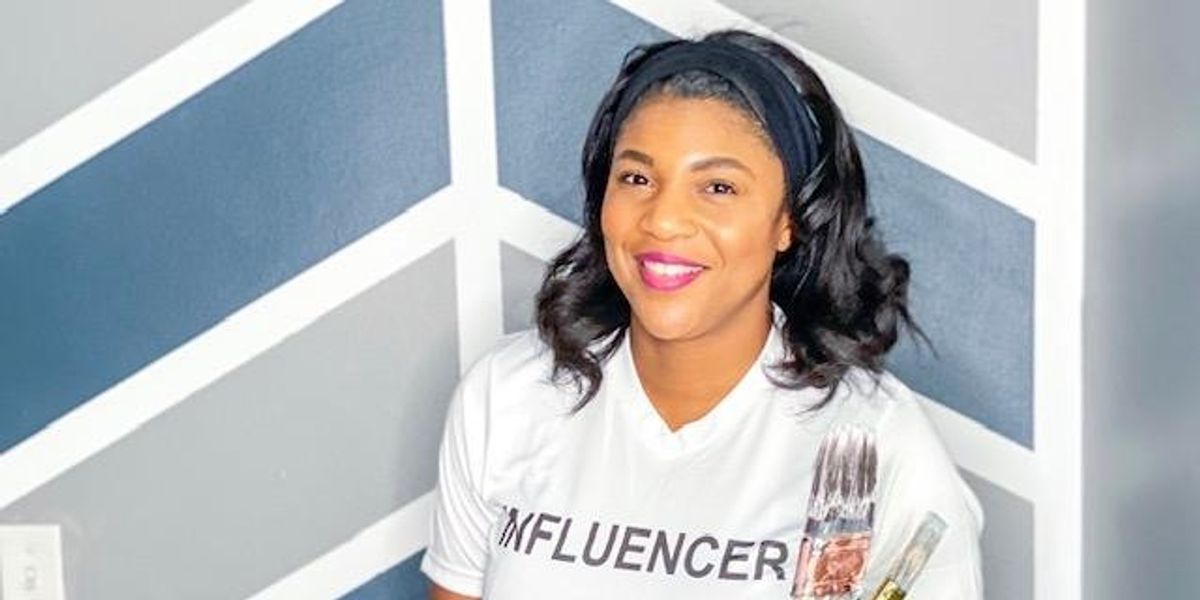
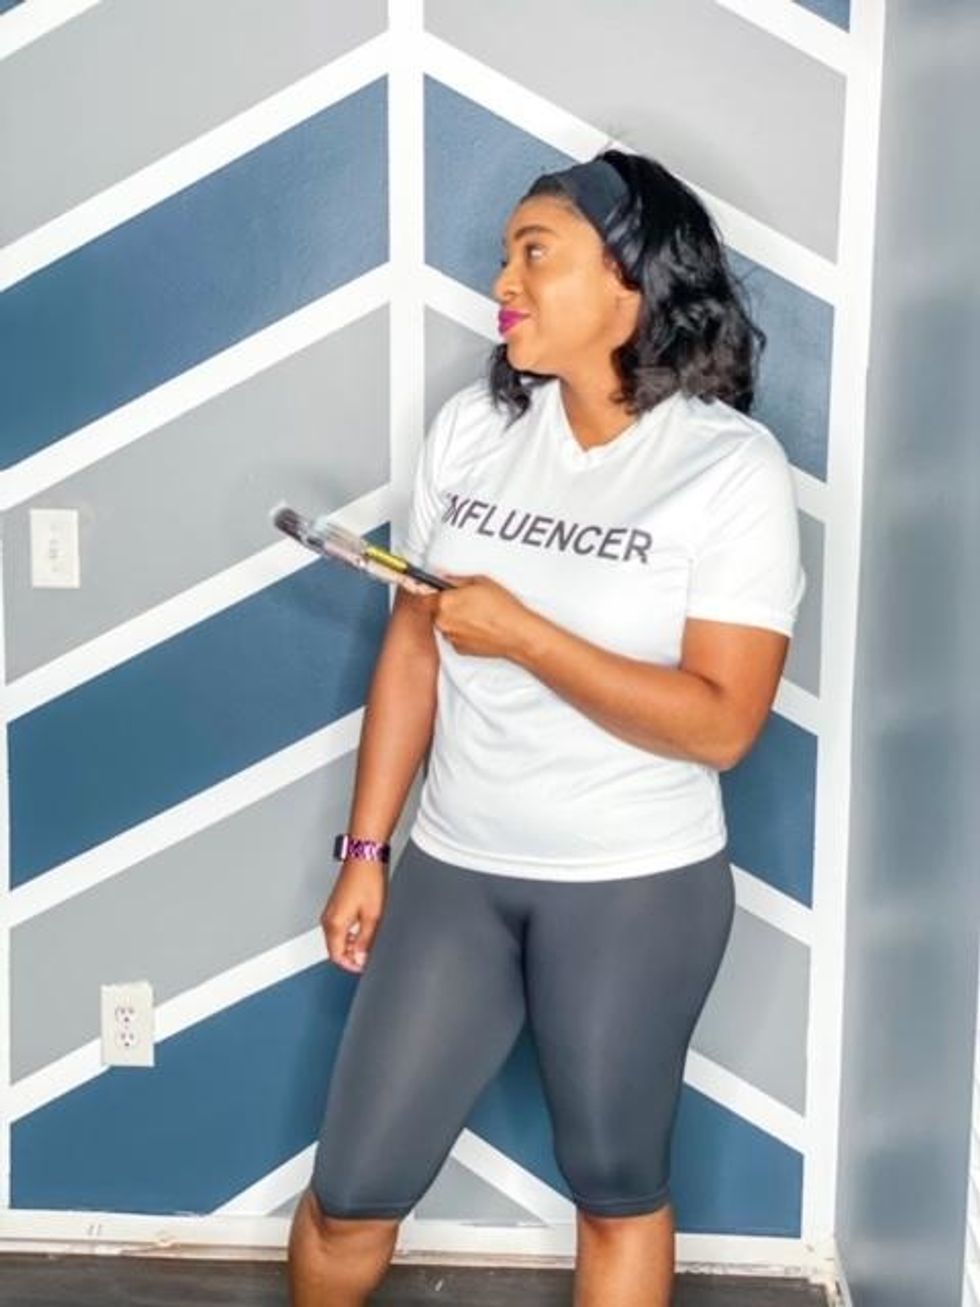
Featured image by Tamron Little.


Among the many individuals who battle severe asthma, Black women face a unique set of challenges. It's not uncommon for us to go years without a proper diagnosis, and finding the right treatment often requires some trial and error. Thankfully, all hope is not lost for those who may be fighting to get their severe asthma under control. We spoke with Juanita Brown Ingram, Esq. and Jania Watson, two inspiring Black women who have been living with severe asthma and have found strength, resilience, and a sense of purpose in their journeys.
Juanita Brown Ingram, Esq.
Juanita Ingram has a resume that would make anyone’s jaw drop. On top of being recently crowned Mrs. Universe, she’s also an accomplished attorney, filmmaker, and philanthropist. From the outside, it seems there’s nothing this talented woman won’t try, and likely succeed at. In her everyday life, however, Juanita exercises a lot more caution. From a young age, Juanita has struggled with severe asthma. Her symptoms were always exacerbated by common illnesses like a cold or flu. “I've heard these stories of my breathing struggles, but I remember distinctly when I was younger not being able to breathe every time I got a virus,” says Ingram. “I remember missing a lot of school and crying a lot because asthma is painful. I [was taken] to see my doctor often if I got sick with anything so I was hypervigilant as a child, and I still am.”
Today, Juanita says her symptoms are best managed when she’s working closely with her care team, avoiding getting sick and staying ahead of any symptoms. Ingram said she’s been blessed with skilled doctors who are just as vigilant of her symptoms as she is. While competing in the Mrs. Universe competition, Juanita took extra care to stay clear of other competitors to ensure she didn’t catch a cold or virus that would trigger her severe asthma. “I would stand off to the side and sometimes that could be taken as ‘oh, she thinks she's better than everybody else.’ But if I get sick during a pageant, I'm done. I had to compete with that in mind because my sickness doesn't look like everybody else's sickness.”

Even when her symptoms are under control, living with severe asthma still presents challenges. Juanita relies on her strong support system to overcome the hurdles caused by a lack of understanding from the public, “I think that there's a lot of lack of awareness about how serious severe asthma is. I would [also] tell women to advocate and to trust their intuition and not to allow someone to dismiss what you're experiencing.”
Jania Watson

Jania, a content creator from Atlanta, Georgia, has been living with severe asthma for many years. Thanks to early testing by asthma specialists, Jania was diagnosed with severe asthma as a child after experiencing frequent flare-ups and challenges in her day-to-day life. “I specifically remember, I was starting school, and we were moving into a new house. One of the triggers for me and my younger sister at the time were certain types of carpets. We had just moved into this new house and within weeks of us being there, my parents literally had to pay for all new carpet in the house.”
As Jania grew older, she was suffering from fewer flare-ups and thought her asthma was well under control. However, a trip back to her doctor during high school revealed that her severe asthma was affecting her more than she realized. “That was the first time in a long time I had to do a breathing test,” she describes. “The doctor had me take a deep breath in and blow into a machine to test my breathing. They told me to blow as hard as I could. And I was doing it. I was giving everything I got. [My dad and the doctor] were looking at me like ‘girl, stop playing.’ And at that point [it confirmed] I still have severe asthma because I've given it all I got. It doesn't really go away, but I just learned how to help manage it better.”
Jania recognizes that people who aren’t living with asthma, may not understand the disease and mistake it for something less serious. Or there could be others who think their symptoms are minor, and not worth bringing up. So, for Jania, communicating with others about her diagnosis is key. “Having severe asthma [flare-ups] in some cases looks very similar to being out of shape,” she said. “But this is a chronic illness that I was born with. This is just something that I live with that I've been dealing with. And I think it's important for people to know because that determines the next steps. [They might ask] ‘Do you need a bottle of water, or do you need an inhaler? Do you need to take a break, or do we need to take you to the hospital?’ So, I think letting the people around you know what's going on, just in case anything were to happen plays a lot into it as well.”
Like Juanita, Jania’s journey has been marked by ups and downs, but she remains an unwavering advocate for asthma awareness and support within the Black community. She hopes that her story can be an inspiration to other women with asthma who may not yet have their symptoms under control. “There's still life to be lived outside of having severe asthma. It is always going to be there, but it's not meant to stop you from living your life. That’s why learning how to manage it and also having that support system around you, is so important.”
By sharing their journeys, Juanita and Jania hope to encourage others to embrace their conditions, obtain a proper management plan from a doctor or asthma specialist like a pulmonologist or allergist, and contribute to the improvement of asthma awareness and support, not only within the Black community, but for all individuals living with severe asthma.
Read more stories from others like Juanita and Jania on Amgen.com, or visit Uncontrolled Asthma In Black Women | BREAK THE CYCLE to find support and resources.

And so, today, I’ve got six questions that you should ask your man over the next couple of days. Now, I’ll be honest: some of these might be hard to ask simply because the answers might be difficult to hear if they’re the kind that you didn’t expect. Still, I believe that it’s important to close out the year by opening up the floor to hear where your man’s head and heart are as you express your head and heart in return. Because, from both personal experience and observation of others, time is too precious to be out here assuming that what you want is what he wants as well.
If you want to know, you need to ask — and I think you can pretty much get the clarity that you need by asking — asking not berating or pressuring — the following six questions before the ball drops at midnight on January 1, 2024.
1. "Are we on the same page?"
 Giphy
GiphyThe reason I’ve written articles like “6 Signs You’re In A One-Sided Relationship” in times past is because I know what it’s like to be seeing someone and, while I think we’re doing one thing, they are thinking we’re on something completely different. I’ve thought that good sex was establishing a solid connection while the guy saw me as his favorite kind of recreational use. I’ve thought I was officially dating while guys thought they were in situationships with me (and no, those two things ARE NOT the same). I’ve thought that seeing someone for months was ultimately leading towards marriage while the guy was having a good time just…seeing me for months (LOL).
And while it’s easy to demonize those individuals while playing the victim role, the reality is when one assumes, it still can make an ass out of them — and yes, many times, because I wanted something to be a certain way, I assumed that they did too.
And that’s why it’s so important to make sure that you and whoever you’re…whatever-ing with (LOL) is on the same page as you are. I don’t care how long you’ve known him. I don’t care how much the two of you have in common. Don’t fall into the “surely, he must be on what I’m on; how could he not be?” trap because men and women are different. That’s not a flaw on the man’s part; that’s just the way it is.
I could go on and on about this particular question alone yet I think you get my overall point. Before going into 2024, see, not only if you’re on the same page but even in the same kind of book. I would hate for you to see your dynamic as a romance novel while he treats it more like a magazine that he casually thumbs through at the doctor’s office — you know, something to do…for the moment. You’d be amazed how much that happens. Sad yet true.
2. "Do we want the same things?"
 Giphy
GiphyOkay, so say that you both are in agreement that you’re exclusively dating. Thing is, you’ve got marriage in your sights while he doesn’t want to get married. “Now Shellie, why would a man get into a one-on-one situation if marriage wasn’t the ultimate goal?” Yeah, this right here is one of the main reasons why I pitched this article in the first place. A man will date you, even exclusively and seriously, and be fine with that because he may like serious relationships while having no intentions of ever getting married at all (check out “Single-Minded: So, What If You Like Dating But DON’T Desire Marriage?”). I mean, who said that everyone thinks that companionship equates to sharing a home, sharing a name, and sharing a life until death parts them from their partner?
Or what about kids? What if someone has verbalized that they can see making you his wife someday (check out “We Asked 10 Men What Makes A Woman 'Wife Material'”)? Thing is, you are in your 30s and want kids ASAP yet he is on the fence about whether he wants children at all. Listen, I have worked with couples, both as a marriage life coach and a doula, long enough to know that this isn’t something that just “works itself out with time.” Why? Because time is not on a biological clock’s side. The way life — and science — have it, men have damn near forever to figure out what they want to do as far as parenting goes. Us? Yeah, not so much.
Bottom line here, whatever it is that is truly important to you, whatever is pretty much a non-negotiable as far as you are concerned, that is something else that needs to be brought up. Because no matter how much the two of you may love each other, that has little to do with if you want the same things — and in order for a relationship to run smoothly, the latter has to be a part of your relationship’s reality.
3. "Have your needs changed?"
 Giphy
GiphyI have shared in articles before that, one of my favorite quotes as far as relationships are concerned is, “People change and forget to tell each other.” This is a big part of the reason why people end up getting divorced, all the while saying that they feel like strangers to one another. It’s because, NO ONE goes day by day, month by month, year by year, and doesn’t change as a person on some levels. And when you’re evolving with another individual who is doing the same, that’s double the shifting. It takes a lot of patience and grace to go through those transitions smoothly.
Anyway, it’s always a wise move to ask your partner if the same needs they had last year — or hell, even six months ago — are the ones that they have now. And I mean in every department too. What they may have liked sexually may have shifted (as is with you). The ways that they used to like you to express your love for them might be a bit different now (as is with you). The kind of relationship that they were looking for — getting older, their goals, and all kinds of other stuff may have altered that as well (as is with you).
You can’t meet someone’s needs if you don’t know what they are and it’s unrealistic to assume that those needs are always going to be the same — no matter how much you may want them to be (that’s a play on words by design). The best relationships are proactive about making sure that mutual needs are met. Discuss each other’s needs with your man sooner than later. Much sooner if you can.
4. "Is this what you thought it would be?"
 Giphy
GiphyEven though I mostly work with married and engaged couples, I do come across my fair share of people who are just dating too. One couple, in particular, I remember the woman being absolutely heartbroken when her boyfriend of three years told her that he wanted to end the relationship because it wasn’t what he thought it was going to be like. He felt that she wanted to monopolize too much of his time. Not only that but she didn’t get along well with his family and they had two different faith beliefs. Although he went into the relationship thinking that so long as they strongly cared for each other, everything would work itself out — it wasn’t going smoothly and he wanted a relationship that required a lot less…finessing.
Listen, a motto that I have is “better to break up than divorce,” so it’s a good thing that he spoke up before paperwork, kids, and a lot of other stuff got involved. However, that story alone is impactful enough for this question to be mentioned because…you’d be amazed how many people won’t speak up about stuff like this unless they are point-blank asked. ASK.
5. "Are we making each other better? Or...worse?"
 Giphy
GiphyThere are so many words that just get “thrown around” without really appreciating the weight of them. One would be “toxic.” Something that is toxic is something that is basically harmful at a poisonous level. And so, when we use the term “toxic relationship,” one way to qualify if one is or not is if it’s making two people better or worse. Honestly, this can apply to familial dynamics, friendships, co-workers, fellow church members…yeah, it pretty much runs the gamut. Yet since we’re talking about romantic connections here, you definitely should discuss with your partner if the two of you are making each other better or worse as the direct result of intimately interacting with one another.
I actually have a male friend right now who is at this crossroads because he doesn’t feel like he or his fiancé are making each other better. It’s not so much that they are making each other “worse” so much as they are keeping each other stagnant — and that’s not good either. Why? Because if there is anyone who you should be able to say that, as a direct result of them being in your life, you are thriving and flourishing, it needs to be your partner. And if that isn’t the case, no matter how much you care for each other, something isn’t healthy about staying together because life is too short to be “treading water” when you should be moving forward.
- If you’re not emotionally maturing, you’re not getting better.
- If you’re not getting stronger in your sense of self-worth, you’re not getting better.
- If you’re not reaching goals that you have for yourself, even if it’s simply because you’re distracted with trying to maintain the relationship all of the time, you’re not getting better.
- If you feel like you’re sacrificing, to the point of losing, parts of yourself, you’re not getting better.
- If you’re not getting better, you’re not getting better.
Better means “more.” Worse means “less.” If there is more "less" than more "more" when it comes to your relationship with your man…don’t overlook that. The time to talk is now. RIGHT NOW.
6. "How do you want to end next year?"
 Giphy
GiphyOkay, so back to what I just said about the whole treading water thing, I definitely think that you and your partner should reflect over the past 12 months and chat about the strides that were made. Yes, as individuals yet more importantly (as it relates to this article), as a couple. If you can pinpoint clear new milestones that were reached — mazel tov! On the other hand, if nothing has really changed at all…you know what I’m about to say, right?
And no, I’m not saying that folks should expect what I just recently read about Fantasia (did you know that she only knew her husband for three weeks before getting married? Wow.). All I’m saying is that healthy relationships consist of two people who move with intention and when intentions are executed, progress is made.
So, as we close this one out — talk about how things were this time last year and if there are clear signs of growth. Then talk about 3-5 goals that both of you can feel good about setting for the new year so that you can keep improving as a couple. Because it would be sad to spend years with someone and, in the words of Nina from the classic movie Love Jones, all you can look at each other and say is, “All we have are all these years.” Geeze.
_____
An author by the name of Justin Wetch once said, "Love starts as a feeling, but to continue is a choice." And in order to choose to continue, in a mutually beneficial fashion, you both need to know that you want the same things and feel the same way. So, before entering into 2024, please make sure that the both of you do — for both of your sakes. That way, you can move with confidence and clarity…without any type of assumption.
And that’s always the best place, relationally, to be.
Let’s make things inbox official! Sign up for the xoNecole newsletter for daily love, wellness, career, and exclusive content delivered straight to your inbox.
Featured image by Riska/Getty Images